Sunday, October 30, 2011

Halloween!

I finished K's princess costume earlier this week and, if I do say so myself, she's adorable!

Halloween 2011

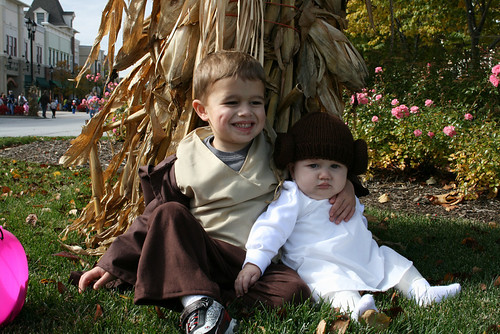
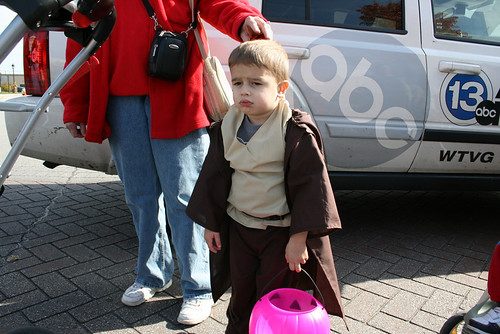
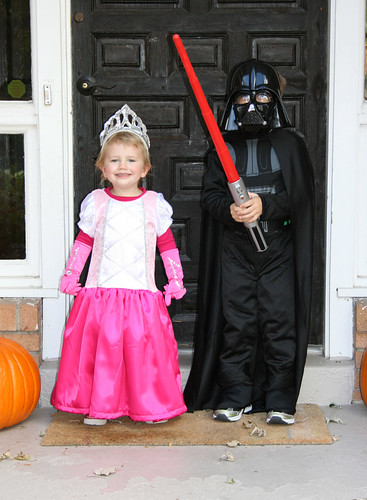
Darth Vader is pretty handsome, too.

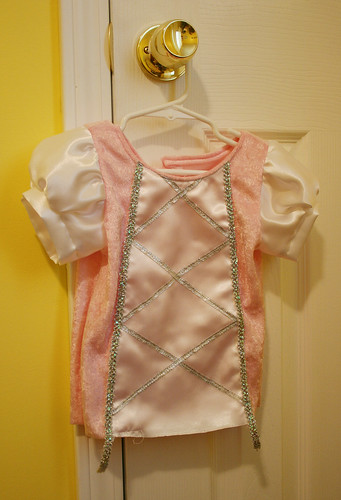
Surprisingly, this was one of those rare times when sewing something myself was less expensive than buying the ready-made version. Most of the princess costumes I saw in the store were around $25-$30 (and they had a Disney princess face plastered on them). The materials for this project cost me $15, and I bought extra fabric because I couldn't decide on which shade of pink I liked for the bodice, so I bought both.

princess dress

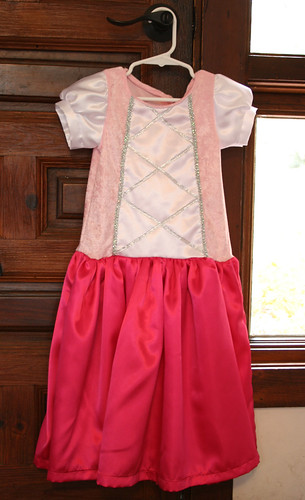
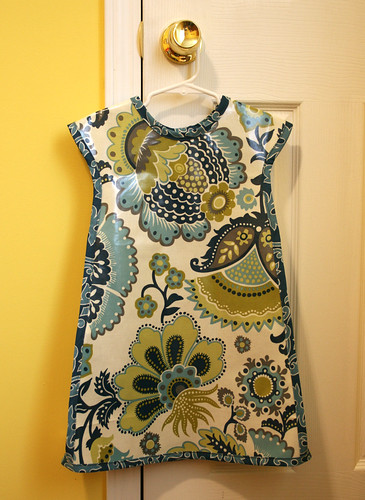
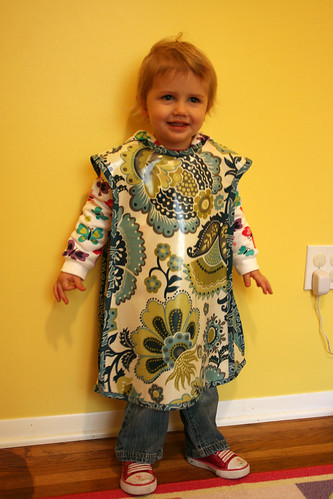
It ended up kinda big on her, but I wanted to allow for plenty of layers underneath. This is Ohio, so it could be 30 degrees or 80 degrees on Halloween, you never know. Plus, this way she can use it for years to come as a dress up outfit. I was really crossing my fingers when I hemmed the skirt- who knew it would be difficult to get a 2.5 year old to stand still for a measuring?

princess accessories

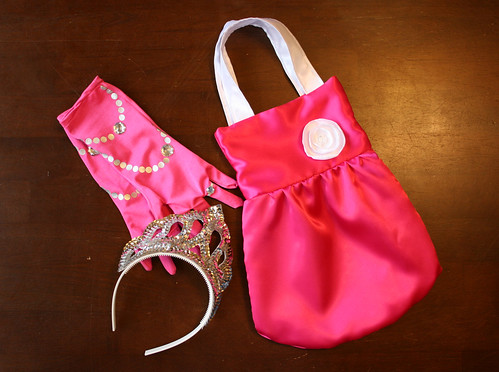
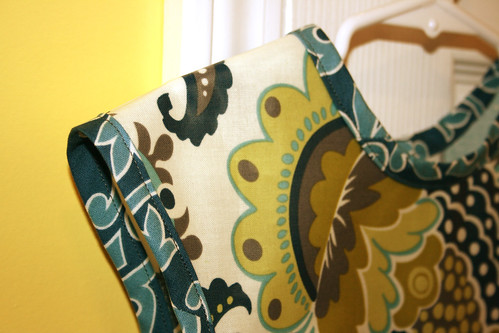
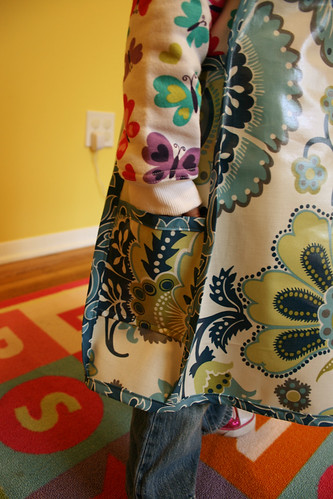
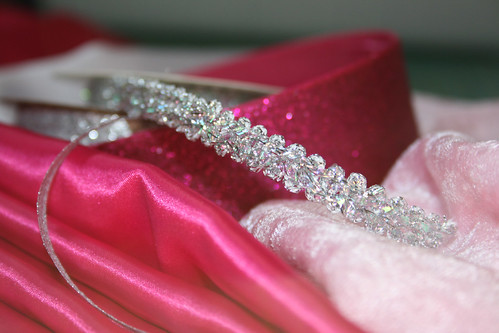
I bought the crown and gloves, but I made the purse/trick-or-treat bag. I didn't use a pattern for the bag- just kind of winged it based on the amount of fabric I had left. I think the proportions look a little off because of this lack of planning, but it'll look better when it's filled with candy. *wink*

princess purse flower

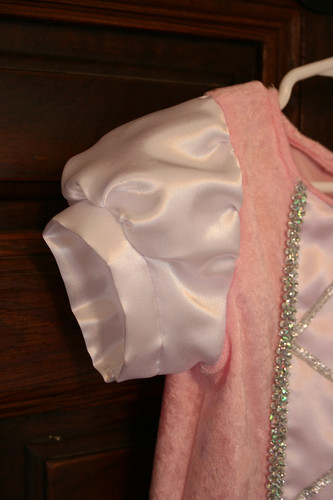
My favorite part is the puffed sleeves. So cute! Make It and Love It's tutorial for this dress was awesome. I'm so proud of myself for drawing my own little pattern for these sleeves. I'll definitely be using these little puffed guys again.

princess sleeve

Hope everyone has a safe and happy Halloween!

Friday, October 28, 2011

Excited? Um, Yes!

I submitted my Circles & Circles & Circles project to the Celebrate Color contest, and to my great excitement my project was chosen as a finalist!

If you have a moment, go check out all the great projects and, you know, vote!

Celebrate Color

Thursday, October 27, 2011

A Little Baking

It's pretty dreary and rainy here today, so it's a good excuse to warm up the house with some baking!

mini apple pies

I'm not much of a cook (ok, not at all), but every once in a while I get the baking bug. I found the recipe for these Bite Sized Apple Pies here and I'm quite pleased with how they came out! They remind me of the Cinnamon Rolls my Mom and Grandma make with leftover pie crust, which I absolutely LOVE. I could eat a whole batch of them myself if left alone for too long.

The recipe calls them mini apple pies, but I like to think of them more as Apple Cinnamon Roll-Ups. Making a pie sounds like a complicated process, but these little guys are super easy!

Friday, October 21, 2011

Circles & Circles & Circles

circles & circles & circles 3

I've always loved patterns of circles. I can remember "doodling" with a compass when I was in elementary school, filling up my notebook with circles and pin pricks from the compass needle. Are kids even allowed to have those metal compasses anymore? Probably too much like a weapon for schools these days.

circles & circles & circles 1

I like the secondary designs created at the intersections. Because of this, I've always liked the orange peel quilt block, although when you see a single block it doesn't immediately call circles to mind.

orange peel block

But when they're repeated in a quilt, you see those circles!

orange peel quilt

Curved piecing still intimidates me, so I thought I'd use an orange peel design as an embroidery piece. I created the design in EQ7, starting with a stencil block from the Block Library.

orange peel resize 1

I selected all the lines and reduced it down to 25% (which made the design 2" x 2").

orange peel resize 2

Then I copied and pasted the small design until it filled the 8" x 8" block.

orange peel resize 3

I then printed out the design and used a water-soluble pencil to trace it onto my fabric.

orange peel tracing

There are so many different patterns within this design to emphasize.

design options

When I was about halfway done with this piece I began second guessing my choices and started a second panel. I eventually switched back and finished my original design, but I'll finish this second one soon too.

op version 2

Glad I went back to this one and finished it!

circles & circles & circles 2

-----

I'm going to link this project up over at Stitched in Color as part of the Celebrate Color series. Go check out the beautiful projects!

Celebrate Color

Tuesday, October 18, 2011

o+s bias trimmed apron

I finally (FINALLY!) got my sewing machine back from the shop this past weekend, so I'm back in business! I could rant and rave about the awful customer service experience I had at this store, but I'll just say that if you live in the northwest Ohio area I can tell you where NOT to buy a sewing machine. The End.

Now, on to happier things!

apron 1

I finished my oliver +s Little Things to Sew apron this weekend– the October project of the LTTS Sew Along hosted by A Little Gray. I decided this project would be the perfect time to try out sewing with laminated cotton. What's better for an apron than a fabric that can just be wiped off?

There are lots of things to consider when using laminated cotton. Here are my observations from working with laminate:

  • Pin holes will stay in the fabric, so if you're going to pin, make sure those holes are in the seam allowance. I actually used double-sided tape to hold my pieces together whenever possible. It stuck really well on the coated-side of the fabric, not so much on the wrong side.

  • I was a bit of a wuss when ironing this stuff. I feared for the safety of my iron and ironing board (and my pattern pieces- I had no fabric to spare!). I gradually increased the heat to the highest temp I felt comfortable using on the laminate, but I still wasn't able to get a very good crease in the fabric. I guess that's just the nature of the material. I was most bothered by this was when making the plackets on the back panels of the apron. I ended up ironing the best I could and then stacking some heavy books on top of the panels for a while before stitching down. I think it helped.

  • I did not encounter as much trouble actually sewing the fabric as I would have expected. My first few trial runs with scraps went through my machine without any special intervention. However, the more layers I had to sew through the harder it became to feed through the machine (those darn double-folded plackets ;).

    apron foot

    I put scotch tape on the underside of my presser foot and that helped enough to slide the fabric through (I came across that tip here). The above photo was taken after I was done sewing and you can see that it has some wear, so I guess that means it was doin' something. I feel like if I had done this project in the heat of the summer I would have had a lot more trouble with the laminate sticking in the machine. One more reason to like fall!


I got some good practice applying bias binding with this project! I don't think I've ever made bias binding before. I've always just made straight of grain binding for my quilts (gasp!). I followed this tutorial for making continuous bias binding.

apron 2

At one point, you have this crazy tube of confusion going on, but in the end you have lots and lots of binding. Which has to be ironed. Sigh.

apron binding

I made the medium size apron, which is a little big on my 2.5 year old but that's okay. Kids grow, right?

apron 3

Love those pockets on the sides!

apron 4

Monday, October 10, 2011

Halloween Costume Sewing

There are all sorts of pink and sparkly things on my sewing table... Halloween sewing has begun!

princess costume 1

I'm using this tutorial to make K's princess costume. In Halloween discussions, she has said that she wants to be many things, but has said Princess the most often and that sounded like the most feasible (and fun!) thing to make. Although this weekend when I told her what I was working on, her response was "I wanna be Spiderman!" No dice, girl. I only have a couple more years left to be a part of the costume decision process and I still want you to be something cute and girly.

princess costume 2

I'm done with the bodice and am quite pleased with the way it's turned out. Now I'm contemplating doing something fancier with the skirt than what's shown in the tutorial, but if experience has taught me anything I should probably quit while I'm ahead and stick with the simple skirt.

A has decided to be Darth Vader this year, which has already been purchased. This was a bit of a relief because I should probably limit myself to one handmade costume per year. Plus, I've already done my fair share of Star Wars costuming.

Behold, Halloween 2009:

Halloween 2009

My crabby little Jedi:

jedi

And super cute Princess Leia:

princess leia

Thursday, October 6, 2011

Pretty Purled Pumpkin

(Ok, that title is a lie because this was knit in the round, so it was all knits, no purls. ;) But I'm all about alliteration, so I couldn't help myself!)

pumpkin 2

Since the weather has been getting cooler, I've been itching to get out the knitting needles again. I planned to knit one of these cute little owls. I grabbed some chunky orange yarn I had on hand and started knittin'. As it started to take shape I couldn't help but see the "pumpkin-ness" of it and changed the project halfway through. I left out a few of the straight knit rounds in the middle to give it a squattier shape and added an i-cord stem at the top. It's actually quite fun to squish and it doesn't stay in that nice pumpkin shape for long before the kids are hugging, smashing, or throwing it out of shape.

I took my knitting needles to A's soccer practice the other night, and started this pattern again (with purple, to avoid mid-project pumpkin transformations) and I think it actually will turn out to be an owl this time!