Tuesday, April 2, 2013

Oliver + S: Family Reunion Dress

family reunion dress 1

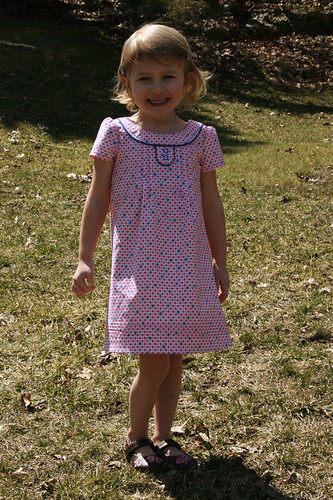
We celebrated my daughter's fourth birthday this past weekend and, in keeping with tradition, I made her a special birthday dress.
(You can see the third birthday dress here and the second birthday dress here.)

family reunion dress 5

I absolutely love this dress. Not only because it turned out great, but also because I tried a few things I've never done in clothes sewing before and I'm pretty proud of myself for it! More on that later...

family reunion dress 2

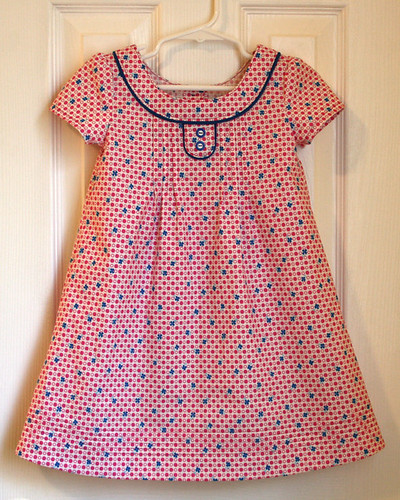
Can you ever go wrong with an Oliver + S pattern? I can't say enough how much I like these patterns. The instructions are always clear and easy to understand. All the little details make for such a beautiful finish. But all those wonderful details do take time and this dress may have been a bit ambitious for the time frame I had to work in.

family reunion dress 4

You'll notice that this is not the same pattern and fabric I posted when I first mentioned working on a birthday dress for K. I was having issues with the foot pedal of my sewing machine and knew I needed to get it in for service. Having dealt with my slow (and most-unfriendly) machine dealer before, I knew I'd be without my machine for at least a couple of weeks. So I quickly whipped up that dress before I took the machine in to the dealer. Well, the dress turned out too big. And rather than try to alter the dress to make it fit better (which I'm not confident I'd be able to do properly), I decided I'd just make a whole new dress. The first dress will fit eventually (and maybe I've got birthday #5 dress done already!).

family reunion dress 3

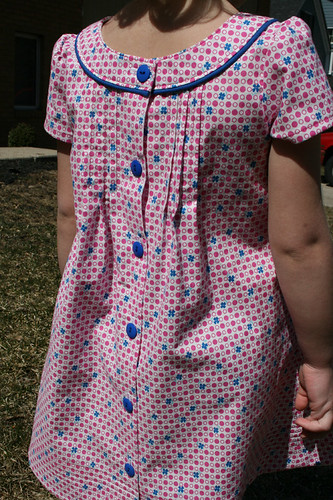
So I got my sewing machine back about a week before K's birthday and set to work! When I say I was working on this dress until the last minute, I'm not exaggerating. I had purchased buttons for the back of the dress a few days before, but had forgotten about the decorative buttons for the front tab. The party started at 2 on Saturday, and at 12:30 I was running to the store to find buttons for the front tab.

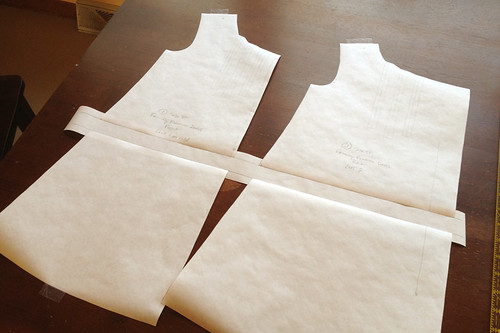
So what about those new things I tried with this dress? Well K is on the tall side and I always add an inch or two to the hem of any dress or skirt I make for her. Luckily with this dress pattern, I thought far enough ahead to realize that if I just extended the lines of the dress (and followed the outward curve), the hem facing wouldn't fit without adjustment too. So this time, I lengthened the pattern the "proper" way and added an inch to the body of the dress at one of the notches. Check out this Oliver + S post for more info about lengthening and shortening patterns. I usually trace patterns onto freezer paper and in the photo below you can see how I've sliced the pattern and added in the extra length.

family reunion dress 6

I also made my own piping for the dress! I saw some other Family Reunion Dresses on Flickr that inserted piping around the neck and button tab and just loved it. Since I couldn't find any pre-made piping the right color, I made my own by cutting bias strips,inserting yarn in the fold, and then stitching it closed using my zipper foot.

family reunion dress 7

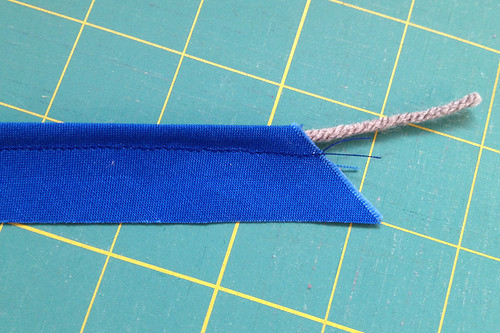
It's the perfect pop of color on the dress!

family reunion dress 8

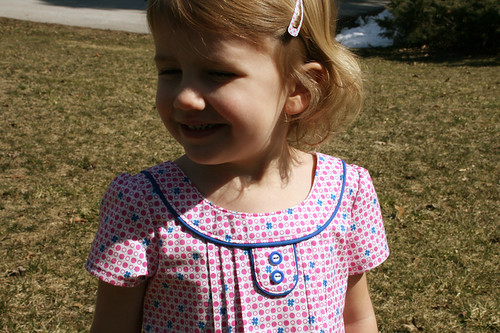
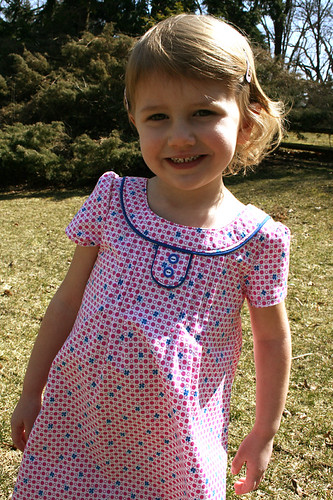
K had a wonderful birthday party, and she looked great too!

Sunday, March 31, 2013

Wednesday, February 27, 2013

WIP Wednesday - 2/27/13

I've turned these leftover strips:

Modern Meadow strips

Into this quilted pillow cover (in progress, obviously):

modern meadow pillow wip 1

I quilted vertical lines on the pieced strips and then some angles in the negative space on the sides. Now I have to decide if this is enough, or if I want to continue those angles to fill all the negative space. What do you think- leave it or add more?

modern meadow pillow wip 2

And, in keeping with tradition, I plan to make a birthday dress for K. I had been browsing around for a dress pattern when I stumbled upon this Paper Fan Dress. It's a (free!) pattern from Anna Maria Horner and I just love the pleating details.

4th birthday dress wip

I started cutting the pieces yesterday and am anxious to start sewing! It was pretty gray and dreary when I took this photo, so the color isn't very accurate, but I swear these fabrics look good together!

Tuesday, February 19, 2013

Palindrome Scarf

I certainly don't need any more scarfs cluttering my closet, but I went ahead and made myself another one anyway.

Palindrome Scarf 1

It's the Palindrome Scarf, which I've made once before. I was in the mood for cables, and this pattern is easy enough that I don't have to be too careful about keeping track of which row I'm on.

Palindrome Scarf 2

The yarn is a bamboo and silk blend from Vickie Howell Collection: Love. Did anyone else watch Vickie Howell's show called Knitty Gritty a few years back? I wouldn't have been able to figure out how to knit a sock or make a thumb gusset on a mitten without that show! I'm bummed that the DIY Network cut all their crafting shows and went all home improvement.

Palindrome Scarf 3

This yarn feels fantastically soft and has a wonderful drape. I found it in the clearance section of my local yarn shop, so it was a total steal. I bought the only three skeins left in that color, so the scarf is a bit shorter than I would have liked but I still love it!

Wednesday, February 13, 2013

WIP Wednesday - 2/13/13

I'll start with a finish:

Cupids Arrows 1

If you click over to my post from yesterday, you can download the foundation pattern for the arrow block!

And now for the in-progress:

I'm still chugging along on my Modern Meadow HST quilt, but trimming all those squares can get tedious. So, as a little distraction, I pulled out some of the scraps and started piecing. The strips are 6" long, but none were more than 1.5" wide. I'm thinking of cutting this into strips and making some sort of pillow with the same neutral fabric used in the quilt.

Modern Meadow strips

Am I a hoarder for keeping such small scraps in the first place? How small is too small too keep? Seriously, I'm like a twitch away from being on a TLC show.

I've also pieced my little spools together. And I've got a project in mind for them too- Noodlehead's Open Wide Zippered Pouch.

little spools 2

Tuesday, February 12, 2013

Archery (and a free pattern!)

I settled on a design for my arrow blocks...

Cupids Arrows 1

It screams "Valentine's Day!" a bit more than my original vision for these arrows, but we can enjoy it for a few more days!

Cupids Arrows 2

I did some simple outline quilting around the arrows and heart. I thought about adding more straight line quilting to the background, but after trying out a few lines I decided it was too busy. If you look closely you can still see the little holes from the quilting I ripped out. I tried steaming them with the iron and it helped, but the holes are still visible. Any suggestions on how to get rid of them??

Cupids Arrows 3

The arrows and the heart are all foundation pieced. I drew the arrow in EQ7, and I'm sharing the pattern with you! You can download the pattern here. The finished size of the block is 8" wide x 5" high. Make sure when you print the PDF that you have Page Scaling set to None. If you use the pattern, I'd love to see it!

Cupids Arrows 4

Happy Valentine's Day everyone!