**This is the Bear Carrier pattern from the book Oliver + S Little Things to Sew by Liesel Gibson.**
I think I have a buttonhole phobia.
I've had the pieces cut out for this bear carrier for a couple of weeks and just couldn't get myself to sit down and sew it all together. I think I was procrastinating because I knew there were buttonholes involved. My last foray into buttonhole-dom resulted in a faux button sewn over top of snaps. But I can't believe I put off making this cuteness so long!
And guess what? The buttonholes went off without a hitch this time. It may be because I used my old sewing machine, which I've successfully buttonholed with before. I made two practice holes and the rest was a piece of cake. A very nerve-racking piece of cake, but cake nonetheless. Why do buttonholes always have to be the last step? I know it's just the way things are constructed, but running the risk of ruining a 95% completed project is quite stressful!
I used a Michael Miller Zoology print for the carrier. You can never go wrong with Michael Miller for kid stuff. I sort of wish the pocket hadn't covered up so much of the print, but I did get that hippo front and center! The straps are just a solid from Moda and check out the super cute way they cross in the back.
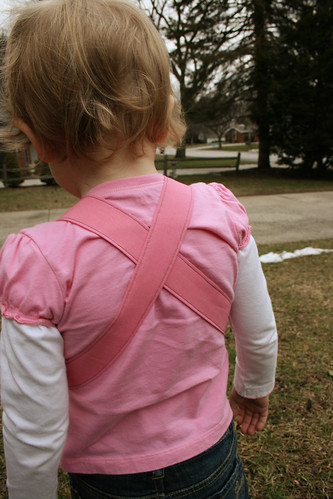
I really should have saved this for a birthday gift since K will be 3 (!) at the end of March, but I just couldn't resist letting her have it now. She is all about her baby dolls lately- changing diapers, feeding them, putting them in Time Out. Her babies spend a lot of time in Time Out. She was very excited to strap Pink Baby That I Got For Christmas to her chest today (she doesn't name babies, just describes them). I think this carrier is going to get a lot of use!
Tuesday, January 31, 2012
Thursday, January 26, 2012
Holey Moley!
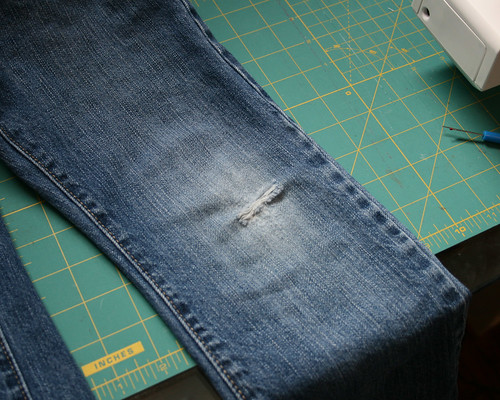
The six-year-old has become a professional at ripping out the knees of his pants. Daycare has an indoor playroom with a foam-padded floor and I'm sure he spends much of his afternoons happily sliding around on his knees. Not at all concerned with the disapproving look he'll receive when I come to pick him up and see that he has destroyed another pair of pants.
Not only is this frustrating because I don't want to keep replacing his school pants every few weeks, but it's also very difficult to find pants to fit this kid. If they fit in the waist, he looks like he's wearing capri pants. If they're long enough there's about 3 extra inches around the waist. Adjustable waistbands are fantastic, but they don't tighten up that much. So if I've actually found a pair of pants that fit him, I want to hold onto them as long as possible.
I finally decided to look into options for repairing these pants. Those iron-on patches have been around forever, but I think everyone knows those things peel off after a couple of washes. I came across two excellent posts on repairing jeans and put them into action!
It's a little scary to rip open the side seam of a pair of jeans. I'm supposed to be repairing, not making things worse after all! But it was necessary to get the jeans under the sewing machine needle. I cut up an old pair of my jeans (that were beyond repair!) to create the patch that I pinned to the inside of the pants.
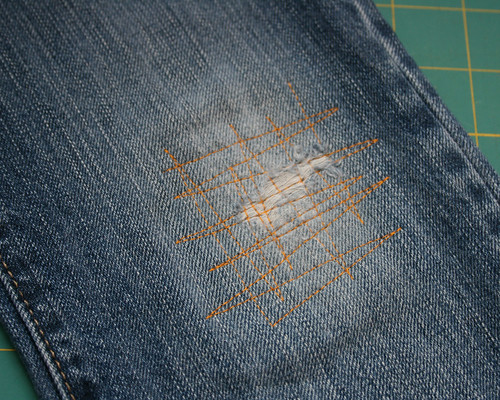
I sewed some random zig zags over the hole and the surrounding area and trimmed down the patch. Then I re-sewed the side seam and serged over the seam allowance.
Here we have the final repair. And after a couple of washes it appears to be holding up well! I wish I could think of some cool patches to applique on his knees, but I'm having a hard time thinking of things that aren't too cutesy/baby-ish. Suggestions are welcome!
Tuesday, January 24, 2012
From the Couch
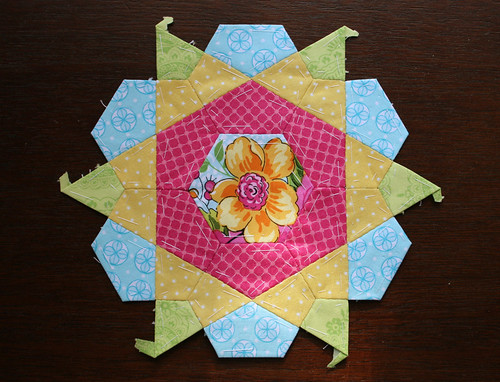
It's a good time of year to curl up on the couch and work on some small projects. My sewing machine hasn't seen much action recently, but I finished another rose star block and my scarf.
There's something refreshing about working with such happy, spring-y fabrics during the blah days of winter. I can see these blocks are going to get addictive!
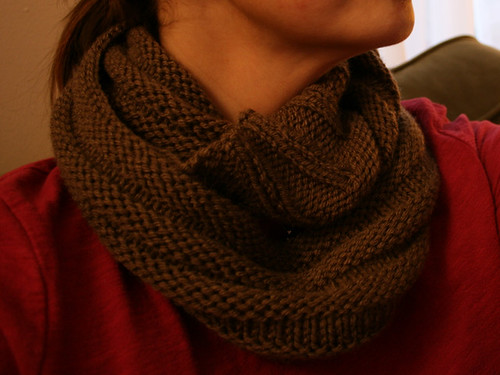
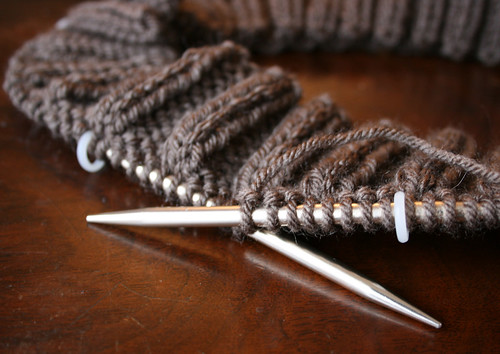
And here's my finished scarf. I found the pattern on Ravelry; it's the Infinitude Scarf by Jeni Chase (and it's free!).
[warning: poor quality self-portrait below]
As much as I would love to use some luxurious merino/alpaca/silk/cashmere/bamboo blend for every knitting project, those fancy yarns are not in the crafting budget. So I used an acrylic yarn purchased at Michael's. It's Vanna's Choice, and if it's good enough for Vanna, it's good enough for me.
The problem with using acrylic: blocking. I tried to block an acrylic scarf once before and I ended up sort-of/kind-of melting the thing. Bummer. This time I actually did a little research (Google!) and had much better results.
And now I'm off to settle into my favorite corner of the couch for more hand sewing!
Tuesday, January 17, 2012
A Feature and a Scarf
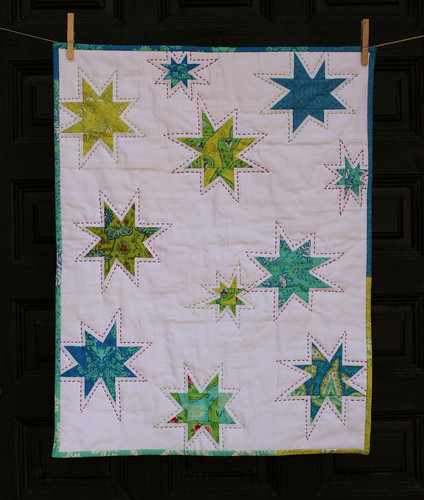
I'm very excited to say that my Wonky Stars Quilt is featured on Modern Day Quilts today!
I've been pleasantly surprised by all the response to this quilt on Flickr. In the grand scheme of blogdom I know it's not much, but it's a pretty big deal to me! It gives me the warm and fuzzies. ;)
Speaking of warm and fuzzies, I started a new scarf last night (super cheesy segue, I know).
There is no lack of scarfs in my wardrobe, but sometimes you just need a mindless project to work on in front of the tv.
Saturday, January 14, 2012
Rose Star Block Party
Through some blog hopping, I stumbled upon selfsewn's blog and saw her beautiful Rose Star blocks. So, so pretty! She's hosting a block party for these blocks and I thought it would be fun to join in! I still haven't finished my last english paper piecing project, but who says I can't start another one? *wink*
Here's my practice block. I'm surprised how quickly it came together with all those little pieces. This block is 8" across. It seems kinda small, so I may increase the size on my next one. I think I may like the look of a solid fabric center hexagon better too.
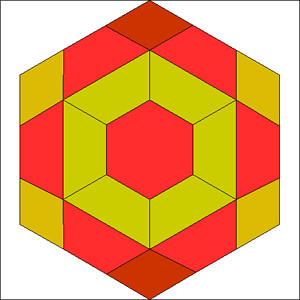
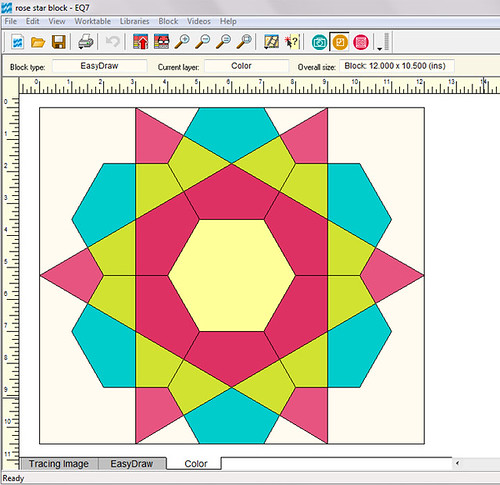
I drew the pattern in EQ7. I thought I might be able to find the Rose Star pattern in BlockBase; I didn't find exactly what I was looking for but I found something close that gave me a starting point for drawing.
This is block #242 (aka Three Patch) from BlockBase. And it's pretty close to the Rose Star block! So I edited it to the Block Worktable, rotated it 30 degrees (so the middle hexagon would be on a flat edge), and added the needed lines to create the kite patches.
And here it is with some solid colors.
Here's a peak at the back:
I'm excited to make more of these pretty blocks and see the other blocks in block party!
Tuesday, January 10, 2012
Wonky Stars: Finished!
My first completed project of 2012! Most of the work may have taken place in 2011, but let's not get technical, okay?
This has been a fun project to take my time with. I posted about it here, here, and here. Apparently I have a lot to say about this little quilt!
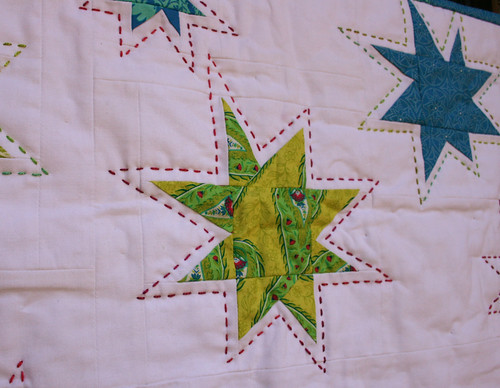
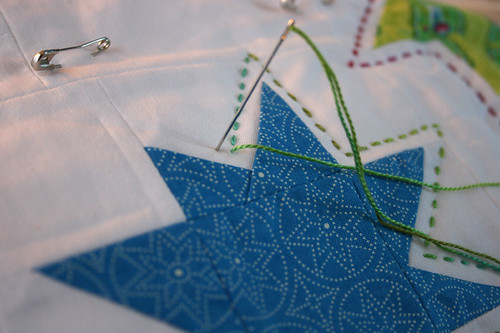
I love this variegated perle cotton thread. So pretty! I was originally going to use the raspberry color for all the stars, but when I went back to the store to get another skein I saw the blue/green and couldn't resist. I think it adds a nice variation.
I need to find more projects to hand quilt using this thread!
Tuesday, January 3, 2012
What's Next?
I'm having a hard time settling on my next sewing project. After working on gifts for the last month (among all the other hustle and bustle of the holiday season), I don't know what to do with myself without the pressure of the Christmas deadline.
So, rather than start something new, I decided it was a good time to pick up one of my UFO's and work on my wonky stars quilt. The slower pace of hand quilting is a nice change from the busyness of the holidays.
Subscribe to:
Posts (Atom)